Main -> In the Classroom: Neuroscience
Speed of neural impulse demonstration (courtesy of Joseph Swope via PSYCHTEACHER listserv 9/10/13)
Generally, the unit comes after the unit on research methods, so this activity is a nice one to tie the two units together. You will need a stop watch and a calculator. Have students stand up in a circle around the room. Have each student use their right hand to grab the left wrist of a classmate. Assign one person the job of starting the impulse. Start the stopwatch at the same time you say "go." The student you designate as the initiator will then squeeze the wrist of the person to his right. As soon as that person feels the squeeze, he will then squeeze the left wrist of the other class mate and so on. Have the last person in the circle say "stop" when they feel the squeeze. Stop the stop watch as soon has he says "stop." Record the time on the board. Do this a for a few instances and record the time for each trial. The times will decrease. For tie-ins to the neural unit, estimate or measure the arm length + shoulders + neck of each student. Add that combined distance and divide by the time it took the signal to get around the circle. Ask "is this an approximate speed for the neural transmission." For the research tie-in, have your students predict what would happen if student grabbed the other wrist and reversed the direction. Test it. Have you students predict what would happen with eyes closed. Test it. What are some confounding variables? Are their biases? The activity is flexible enough to be the start of quite a few subsequent activities, discussions and assignments.
Got Neurons? How to Teach Neuroscience Mnemonically.
In this article Richmond et al. (2011) describe the benefits of using the keyword mnemonic to teach neuroscience terms such as Amygdala (army), "An army (amygdala) has to control aggression and fear in battle." Or "Imagine that someone serenades(serotonin) you. This can affect your mood or make you sleepy. Richmond et al. provide 25 neuroscience terms, keywords, meanings, and mental images that may aid student's comprehension.
Reference: Richmond, A. S., Carney, R. N., & Levin, J. R. (2011). Got neurons? Teaching neuroscience mnemonically promotes retention and higher-order thinking. Psychology Learning and Teaching, 10(1), 40-45.
Free Neuroscience Course for Educators from the Annenberg Foundation
"Insights drawn from neuroscience not only provide educators with a scientific basis for understanding some of the best practices in teaching, but also offer a new lens through which to look at the problems teachers grapple with every day. By gaining insights into how the brain works—and how students actually learn—teachers will be able to create their own solutions to the classroom challenges they face and improve their practice."
Teaching Neuroanatomy with a Showercap. Divide students into small groups and have them label a showercap. Follow the link for a blog post describing the activity.
Vanags T, Budimlic M, Herbert E, Montgomery MM, and Vickers T (2012). Showercap Mindmap: a spatial activity for learning physiology terminology and location. Advances in physiology education, 36 (2), 125-30 PMID: 22665427
Using Mnemonics to Study Cranial Nerves. Effective memory aid for your class. The article provides the needed materials.
Bloom, C. M., & Lamkin, D. M. (2006). The Olympian struggle to remember the cranial nerves: Mnemonics and student success. Teaching of Psychology, 33(2), 128-129. DOI: 1207/s15328023top3302_8
Using Mnemonics to Study Neuroscience. If you like to use memory aids in your classroom, this article provides mnemonic materials to learn neuroscience.
Carney, R. N., & Levin, J. R. (1998). Coming to terms with the keyword method in introductory psychology: A "neuromnemonic" example. Teaching of Psychology, 25(2), 132-134. DOI: 10.1207/s15328023top2502_15
Teaching Psychology for Sustainability: Biopsychology
Looking to incorporate environmental issues into your courses? Check out these "lecture discussion topics; class activities; multimedia resources; suggested readings for students..."
Neuroscience Online.
"This online, interactive courseware for the study of neuroscience is provided by the Department of Neurobiology and Anatomy at The University of Texas Medical School at Houston."
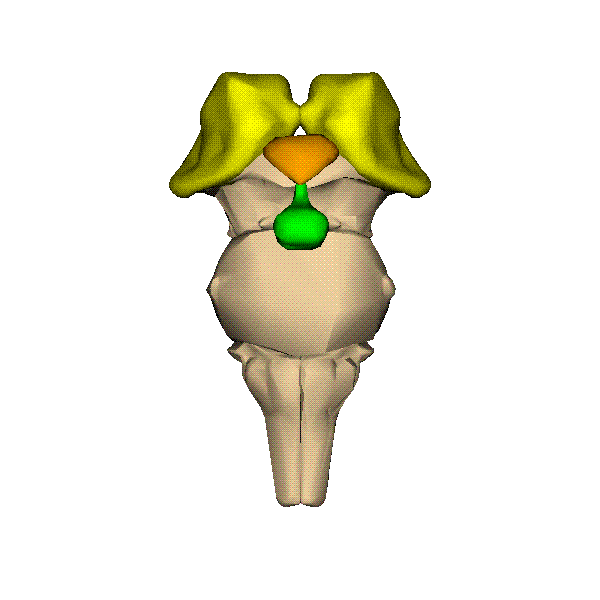
3-D Brain Parts
by Jeff Stowell (jrstowell@eiu.edu)
-
Below are several animations that you can use in your courses. They will animate when placed on a PowerPoint slide and shown in “Slideshow View.” They will also animate when displayed on a web page. Finally, if you want to change the speed of animation, you can open and edit these animated GIFs using the free Microsoft GIF Animator program, mentioned above.
G2C Brain (http://www.g2conline.org/2022) (courtesy of Jaclyn Spivey via STP Facebook Group 9/6/13)
The G2C Brain is an interactive 3D model of the brain, with 29 structures that can be rotated in three-dimensional space. Each structure has information on brain disorders, brain damage, case studies, and links to modern neuroscience research. Also available is the 3D Brain App. Search for "3D Brain" in your iPhone/iPad, Android, or Windows phone app store.
BrainView app (https://itunes.apple.com/gb/app/isurf-brainview/id381072423?mt=8) (courtesy of Jaclyn Spivey via STP Facebook Group 9/6/13)
BrainView is a brain MRI tutor based on MRI automatic segmentation. This produces an automatic atlas of neuroimaging based on T1 MRI images.
Directions and Rubric for a neuroscience book club (courtesy of KatieAnn Skogsberg)
(first posted on stp “Teaching Resources for Biological Psychology and Neuroscience page 11.25.2020)
Skogsberg.Book Club Instructions 2020.docx
K. Skogsberg11.25.202.Rubric for Book Club_Sp20.docx
Collaborative classroom activity to review important components of neurotransmitters (Courtesy of Amy Anderson Zose from the stp facebook page for Teaching Bio Psych and Neuroscience)
Amy Anderson ZoseLab 4 - Neurotransmitters Chart.docx
"Mystery Neurotransmitter" Lab- In an additional assignment to the Neurotransmitter chart, Dr. Anderson Zose shares a Lab activity here.
Lab 4 - Mystery NT.pdf
Dr. Beth Ann Rice shared an artifact assignment (students use a personal item or essay to convey a concept) and a rubric (from the STP's Teaching Resources for Bio Psych Facebook Page). This functions as an alternative to a conventional essay assignment in many areas, including biological psychology
Artifact instruction and rubrics.pdf
Fend off the ZOMBIES!-in this activity created by Dr. Christina Ragan, students are asked to create chemical substances of various forms to neutralize a zombie. (presented at ACT 2021, and on her "Teaching Resources for Biological Psychology and Neuroscience Facebook page: https://www.facebook.com/groups/teachingneuro/)
In Class Activity 2-drugs zombie.docx
Neuro Lab-Investigating the nervous system of the leech: students learn how to use a procedure to gain access to neurons within the leech.
https://media.hhmi.org/biointeractive/vlabs/neurophysiology2/index.html?fbclid=IwAR0frygMnbEE6aHV5JGQtOn1uxiUXILtZmmdZRpwoIUqRWdE3qBTcjEvp70
BrainU: Contains Biological Bases of Behavior Labs.
From the site: "Science teachers from Minnesota, New Jersey, and Wisconsin have utilized BrainU training and resources since the program's inception in 2000. With content ranging from 2-week-long teacher training sessions to 1-hour student assemblies, hands-on activities, and student/teacher guides, handouts, and other materials, this website gives you fingertip access to many options for your classroom."
http://brainu.org/?fbclid=IwAR3dXn5lhhEbnmTMA-_i41TU5bEeAXLIEg2OQ7APP4XxZBKNJtXFWddCK3U
Play dough Brain Activity Courtesy of Sarah Ferdindand from STP's Facebook Page
Here are the powerpoint slides Sarah uses to guide students through the activity (she recommends each student have three distinct colors to work with):Playdoh Brain.pptx
Here is a youtube video she recorded to accompany the slides (for the instructor to view): https://www.youtube.com/watch?v=9xhXJLpnXiY
Interactive Brain Atlas- posted by Teresa Mitchell on the Teaching Resources for Biological Psychology's facebook page (09/14/2022)
This informative atlas is also organized by tabs that allow students to explore readings about thinking, behaving, sensing; diseases and disorders; brain anatomy and function; and has "neuroscience in society" readings and also labs.
Access the link to the interactive atlas here
Google Drive Folder containing a large list of biopsychology on line resources- originally curated by Christina Ragan (March 13, 2020) on the Teaching Resources for Biological Psychology's facebook page
This google sheet has a MASSIVE number of interactive activities and discussions that can be used across a variety of neuro-based courses. Colleagues continue to add to the growing list. Access the resource page here
Comments (0)
You don't have permission to comment on this page.